
 from our garden
The kiss of the sun, for pardon.
The song of the birds, for mirth.
One is nearer God’s heart in a garden,
than anywhere else on earth…
A most delightful (if somewhat grandmotherly) pastime—making potpourri with snippets of herbs and flowers from my garden. Here are a few combinations I have found exceptionally pleasing.
 lavender ‘n rose potpourri

(Early Summer)
1 cup rose petals (I choose ‘Angel Face’ for its soft rose color
and extraordinary fragrance – but any light color rose you love will
work nicely. Remember, the darker the petals, the more likely they
will turn an unpleasant black when dry.)
1/4 cup rose buds (I use pink or white miniature rose buds from our garden, again anything you love is fine)
1/2 cup lavender flowers
1 cup rose geranium leaves (small leaves work best)
1/4 cup blue delphinium blossoms or 1/4 cup blue salvia flowers (This
adds color and texture to the mix rather than fragrance.; I have used
thyme blossoms, snippets of cedar and even lemon verbena leaves. Keep
in mind that scented blossoms will change the fragrance somewhat.)
4 tablespoons orris root powder
5 drops Victorian rose essential oil
5 drops lavender essential oil
Dry all flowers and leaves until they are crisp.
Mix together gently in a large bowl. Add the orris root and mix
again. Add oils one drop at a time, mixing after each scent is added.
Put the potpourri into a large glass jar. Seal it tightly for several
weeks while it matures. Stir occasionally.
Enjoy!
pearly everlasting potpourri
(Late Summer)
4 cups Pearly Everlasting (dried flowers only)
These are common wildflowers along the highways and byways of the California foothills. I gather them in late August, before the rains come, and use them in potpourri, for dried wreaths and arrangements all winter long. Nothing else smells quite so wonderful. If this charming flower does not grow wild in your part of the world – try a purchased pepper grass or other
dried botanical. Just be certain it has a heavenly fragrance and
is substantial enough to stand up to being gently mixed with the following
ingredients.
1 cup dried Lemon Verbena leaves
3 cups English Lavender flowers (need not be dried in advance)
2 cups Rosemary Sprigs (need not be dried in advance)
24 sticks of cinnamon, broken into 1 or 2 inch pieces
48 whole cloves (you can count ’em if you want – I just dump in about a handful)
Gently mix everything together in a large bowl and allow to dry in a warm room for a couple of weeks before packaging.
It’s not fancy or expensive, but it is the most delightful Fall and Winter Potpourri I’ve ever found.
Nothing contributes so much to tranquilizing the mind as a steady purpose, a point on which the soul may fix its intellectual eye.Mary Wollstonecraft Shelley
herb drying made simple
wooden clothes drying rack
+ 3 discarded window screens
= An effective herb drying rack
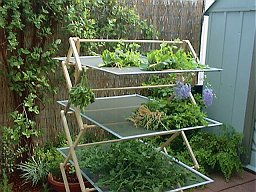
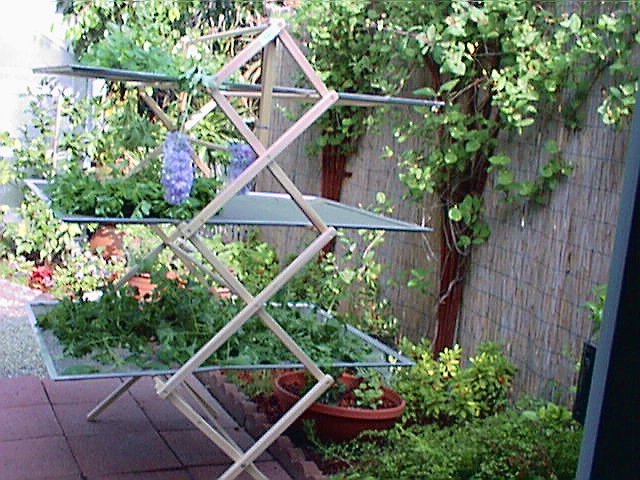
The screen frames slide perfectly across the double dowels forming three shelves. Herbs which need to be hung are suspended with rubber bands from the single dowels and the rack’s ends. By placing my rack in the garden shed and turning on a small fan, to move the very warm air, herbs are corn flake dry in a day or two. I have read that herbs need to be dried slowly at cool temperatures to derive the most fragrance, but, this method dries them so rapidly they retain both color and intense perfume. An unbeatable combination in my estimation.
herb wreaths
Why on earth would I decide to offer instructions for wreath making to a generation of crafters who have shelves filled with books on the subject. Perhaps, because in looking through my shelf of books (Oh yes, I have them too) practically every thing I read listed a “hot glue gun” as the first item needed to begin. Mercy!

I make herb wreaths because I want to smell the herbs – not hot glue. I want to go to my garden, early in the morning, after the dew has evaporated, but before the sun has heated my plants until the scent is weakened. I want to cut a bucket of FRESH herbs, carry it to the potting bench and using only a few lengths of twine or raffia, put together something worthy of being called a Herb Wreath! I want to be able to reach above my cabinet and pinch off a few springs to drop into soup without fearing I’ll poison the whole family. So… if you’re also interested in an old-fashioned wreath, like the one hanging in our kitchen….

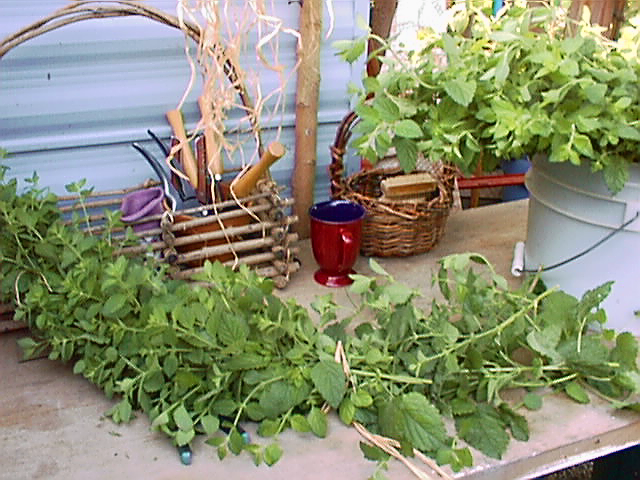
Begin by gathering a bunch of the fresh herb together until you can’t hold another stem between your thumb and forefinger. Cut all but three or four stout stems off so the bunch is about 5 or 6 inches long. Secure the first bunch tightly with a length of raffia, leaving a long end to wrap the herbs together.
Form a garland by adding bunch after bunch of the fresh herbs – laying the tops of one bunch against the stems of the last and wrapping the raffia tightly around both. Continue wrapping and tying until the garland can be formed into a circle the size of the wreath you want. Usually somewhere between 18 and 24 inches of garland makes a very attractive wreath… but the choice is yours. Wreaths come, as you know, in sizes from tiny to HUGE.
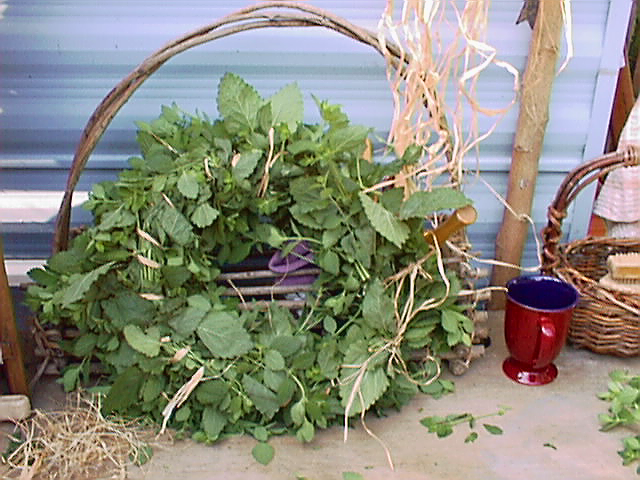
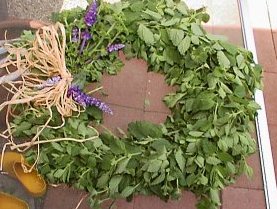
Secure the top of the last bunch of herbs to the stems of the first bunch and tie tightly. If you have accomplished your goal, the raffia wrapping will show on the “back” only. The stems and ties will be covered completely on the “front” of your wreath. Complete the project by adding decorations, if you choose. I finished this wreath of Lemon Balm off with a few sprigs of Prince Rupert scented geranium because of it’s compatible fragrance, and some blue salvia, securely fastened to the wreath with a raffia bow.
Keep in mind as you decorate your wreath that it is going to shrink in the drying.
What looks like too much at this stage can easily look skimpy
once the herbs are dry. Also, if you want to add silk ribbons, I strongly advise that you wait until the herbs are totally dry. Green stains on lovely ribbon can be frustrating, to say the least. Place your wreath on a flat surface similar to the drying rack described above and allow to dry thoroughly. Mine take about 72 hours, but temperatures are usually reaching the 80’s by mid-afternoon during May and early June here in California!
Arrange any full leftover stems of the herb in “brooms” 7 or 8 inches long by stripping the leaves off the bottom inch or so of the stem and fastening together with twine or a rubber band. (I like rubber bands because they tighten as the stems shrink in drying). Brooms can be hung or dried laying flat, depending on the substance of the stems you are working with. Soft stems such as oregano and mint need to be hung upside to form straight dried brooms. Marjoram, lavender and any other herb with stout stems work fine laying flat. Finally, scatter any trimmings
and loose leaves on the racks to dry, too.
sweet herb wreath
Sweet Marjoram, Lambs Ears, Dusty Miller and Pink Rose Buds.
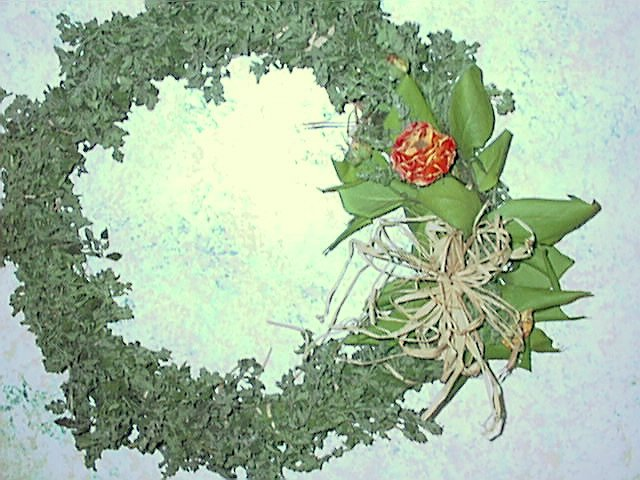
Harvest the marjoram for this wreath just as the flowers start to open.
Form the basic wreath following the steps shown in herb wreaths 101 – above. Arrange a few stems of dusty miller flowers, still tightly closed – a few large lamb’s ear leaves and 5 or 7 tight pink rose buds artistically around the wreath. For this one, I used the lamb’s ears and roses as a bow, dotting the dusty miller around to balance the whole thing. Dry on a flat surface. Enjoy! If your harvest produces more marjoram than you
can use for wreaths (don’t forget to make one for a friend – a lovely, if inexpensive, gift) try gathering a bunch of stems together cutting them about 8 or 9 inches long and tying them with a ribbon or raffia bow. Lay them flat to dry, then add decorations to make an interesting swag, or simply hang them in the kitchen to snip off for cooking.
Finally, strip the remaining leaves away from the stems you cut off while making wreaths and swags, scatter them on a screen and dry them for use in soups, stews and dressing!
savory herb wreath
Oregano, Bay Leaves and Gold Roses
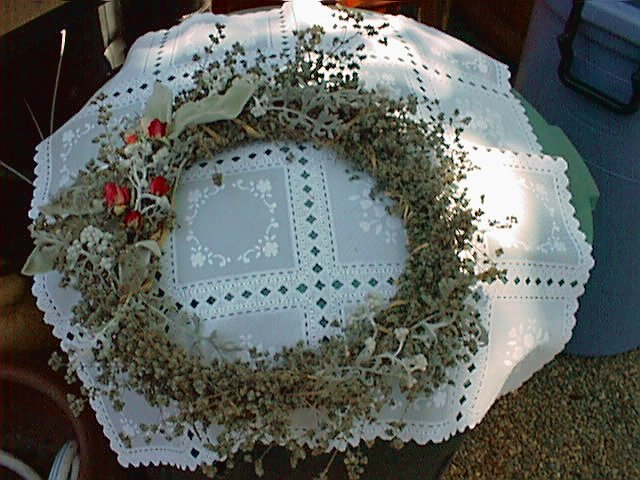
Made this wreath using the same basic method as above. Found, through trial and error a length of 10 gauge wire formed into a circle and used as a base helps these softer herbs to hold a shape. Also, during drying, it became so flat and uninteresting I seriously considered throwing it away altogether. But by the end of the 4th day it was crisp and actually looked like a wreath after all. Learned that the bay leaves curl if not “pressed” to dry. I would certainly try this combination again, but next time I will press the bay leaves and replace the gold roses with whole heads of garlic, and maybe just a few red chili peppers!. I really do love it above my kitchen stove. Oregano makes swags or “brooms” similar to the marjoram – but they must be hung to dry properly. If laid flat they do not appear straight and I ended up stripping off the leaves for cooking, Next season I will remember to hang the oregano brooms to dry.
lavender bottles
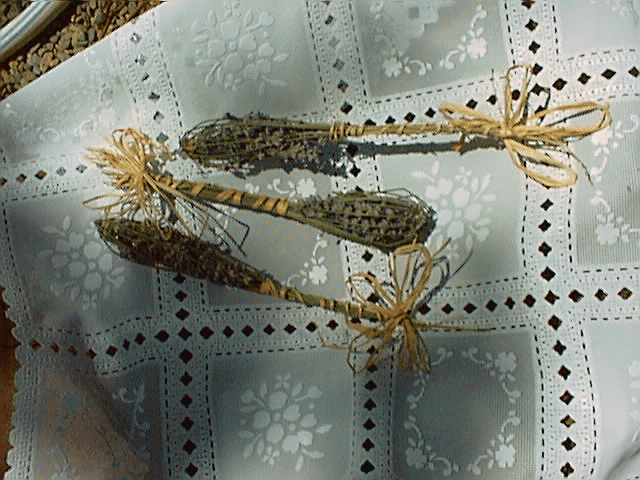
have always been fascinated with Lavender Wands or “Bottles”. A sweet, old-fashioned use for lavender – an aromatic bundle to freshen a linen closet or clothing drawer. Finally, this year, my garden produced lavender with stems of sufficient length to accomplish making a few. I love them!
They are wonderful, as anticipated.
When my flowers were ready to cut, I checked my library for instructions… and as usual, what I ended up with is slightly different than anything I found in my books. Here are a few things I learned during the process: Cut lavender stems as long
as you can, without cutting off the second set of buds. Choose flowers with stout stems Gather together several stems (one book said 13, another 40!) and tie them securely together with raffia or twine below the main flower group. This may leave a few of the lower flowers on the “bottle”, but I think it adds to their charm Hold the bundle in the circle of your thumb and forefinger at the tie, gently rolling the stems, one at a time,over your finger. It is evident in the photo what happens to the stems that are too fragile, or that are bent without holding them tightly and rolling them carefully. The “bottle” gets pointy! Arrange the rolled stems around the flowers evenly, forming a cage. Tie securely below the flowers,
and in one or two more places down the stem. Place them on a flat surface in a dark, well ventilated area to dry. Decorate the bottles with ribbon or raffia after they are completely dry. The first ones I tried needed to be redecorated because the stems shrink so dramatically in drying.
window box
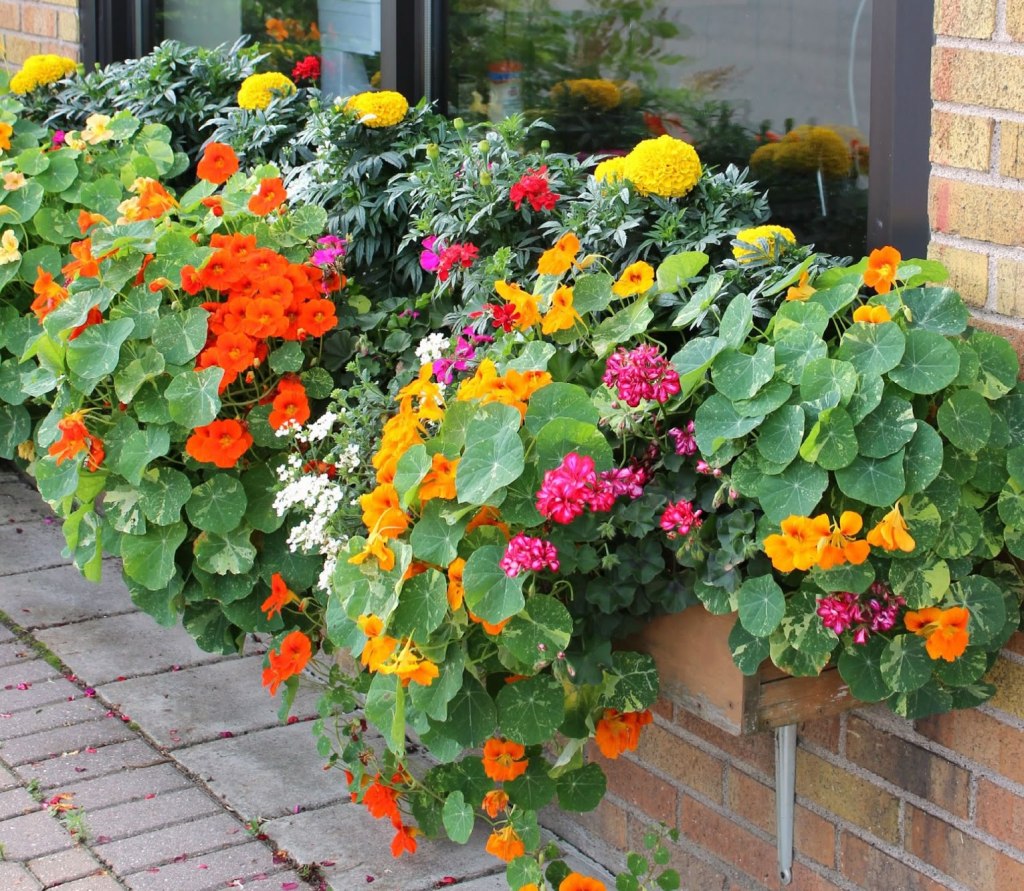
One of the French country names for the nasturtium means ‘nose-twitcher’ and refers to the peppery smell of the plant. It is delightful planted in a small terra-cotta window box, along with ‘pot marigold’ (Calendula – Gitana) and a variegated ginger mint or other variegated herb of your choice. Any of which make tasty additions to a fresh green salad. A small window box like this also brightens up the table as a centerpiece for any outdoor meal. Plant your window box in the spring, place it in full or partial sun light and keep it from drying out completely. To keep the ‘nose-twitcher’ (and all your plants) flowering profusely through the summer, deadhead regularly. Once a plant has set seed it considers it’s work done and will make fewer and fewer flowers. By following these tips, your window box (and your flower beds) will give you a summer’s worth of delights.
companion planting

discourage garden pests without harming helpful insects such as bees and lady bugs, will deter pests naturally, even improve the flavor or growth rate of companion vegetables.
- Basil – Plant with tomatoes tp improve their flavor and growth, repels flies and mosquitoes. Keep basil away from Rue however.
- Bay Leaf – a fresh bay leaf in your storage container of beans, grains or flours will deter weevils and moths.
- Bee Balm – Plant with tomatoes to improve their growth and flavor.
- Borage – Plant with tomatoes, squash and strawberries. It deters tomato hornworm.
- Caraway – Hard, compacted soil? Plant caraway to help loosen it up.
- Catnip – Deters flea beetle.
- Chamomile – Improves the flavor of cabbage and onions.
- Chervil – Companion to radishes for improved growth and flavor.
- Chives – Improves the growth and flavor of carrots.
- Dill – Improves the growth and health of cabbage but don’t plant it near your carrots.
- Garlic – Plant near your roses to repel aphids.
- Gopher Purge – The roots spread to 20 feet and gophers and moles don’t like the odor, so plant about every 40 feet.
- Horseradish – Plant in your potato patch to keep away potato bugs.
- Hyssop – Companion plant to cabbage and grapes as it deters cabbage moths. Don’t plant near your radishes though.
- Lovage – Improves the health and flavor of most plants.
- Marigolds – Plant among your tomatoes to ward off nematodes.
- Marjoram – Improves the flavor of all vegetables.
- Mint – Deters white cabbage moth and ants. Also improves the health of cabbage and tomatoes.
- Peppermint – Repels white cabbage moth.
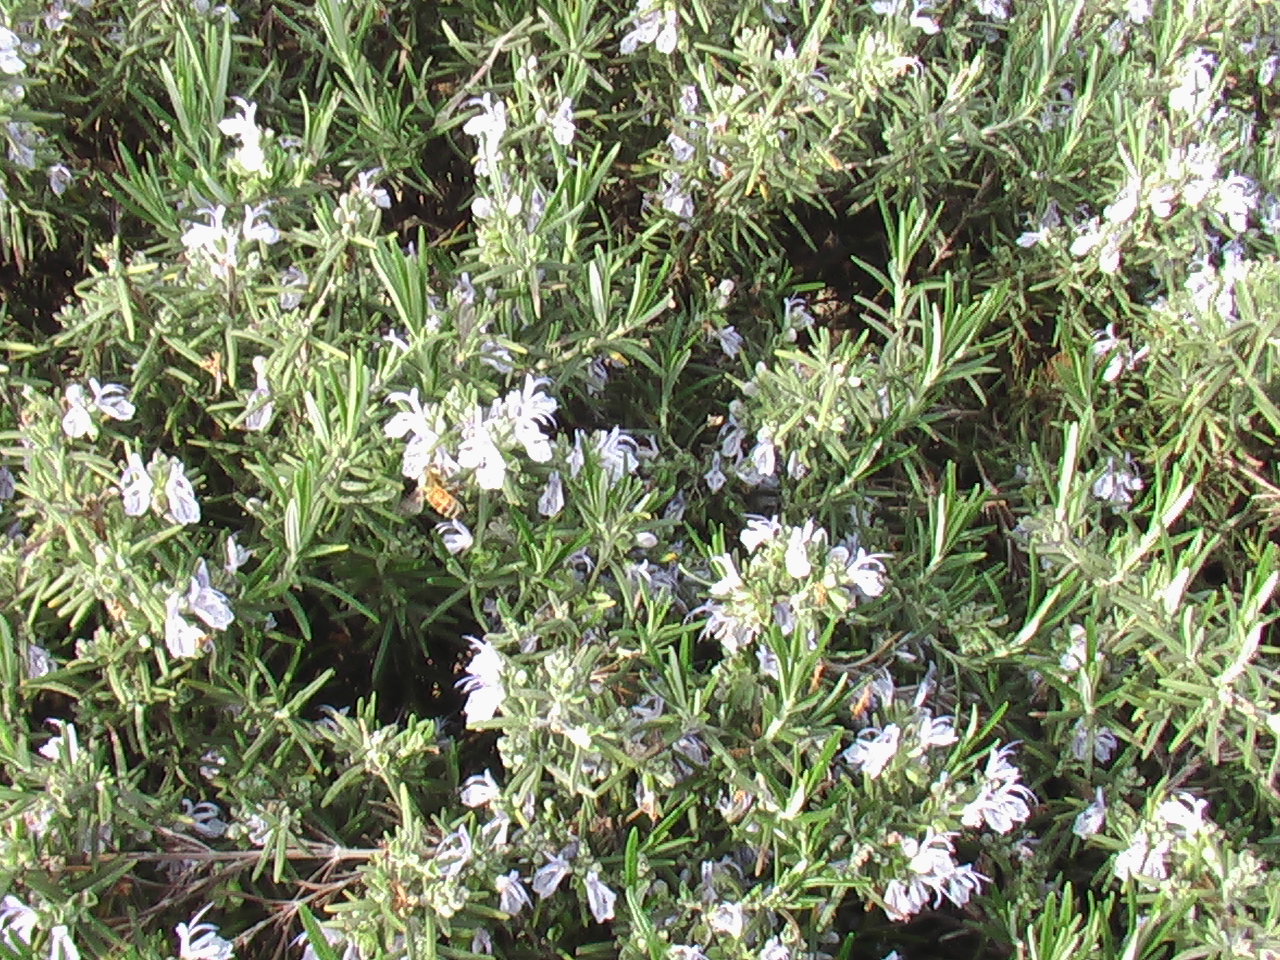
- Rosemary – Companion plant to cabbage, beans, carrots and sage. Deters cabbage moth, bean beetles and carrot flies.
- Rue – Deters Japanese beetles in roses and raspberries.
- Sage – Companion plant for rosemary, cabbage and carrots. Deters cabbage moth, beetles and carrot flies. Keep away from the cucumbers though.
- Summer Savory – Plant with beans and onions to improve their flavor and growth. It discourages cabbage moth also.
- Tansy – Plant with fruit trees, roses and raspberries. It deters flying insects such as Japanese beetles, stripped cucumber beetle, squash bugs and ants.
- Thyme – Deters cabbage worms.
- Wormwood – When planted as a border it helps to keep animals out of the garden.
molasses & beer fertilizer
Want to have the greenest, most beautiful, yard in your neighborhood? Spend Time in it – Love the time you spend in it- & Spray it with molasses and beer! (Jerry Baker’s Formula/ My EXACT MIXTURE)
- 2/3 cup Dawn (blue) Liquid Detergent + 1/3 cup water
- 1 can Coors Original Beer
- 1 cup Lemon Ammonia
- 1/2 cup Grandma’s (what else) Molasses
- 3 tablespoons Miracle Grow Dry Plant Food dissolved in 1 cup water
- Mix thoroughly. Apply from hose end sprayer. Cover EVERYTHING (herb garden, rose garden, flower beds, vegetable beds, lawn & shrubs) every 2 weeks in spring & summer, once a month in late fall & winter. Spray early in the morning only.

